 Aussie AutoGlass
 - April 10, 2023
- By feng gao
- In Uncategorized
- Tags wind+screen+repair
- 16
- 0

Wet sanding can be used on new paint to provide an even finish and remove what is commonly referred to as the “orange peel” effect, where the paint appears to have the texture of an orange skin. On existing paint, it can be used to remove scuffs or shallow scratches or restore the luster of the paint. Wet sanding can cause damage to the paint of the vehicle if not done correctly, so take your time as you progress through the process.
1.Determine if wet sanding is right for your car. Wet sanding can be an excellent way to restore your paint to its original luster, but it isn’t always the best option. Deep scratches that reach the metal, for instance, often cannot be repaired through wet sanding alone. If the clear coat on the paint has scuffing and scratches, however, wet sanding may be the right solution for you.
•Scratches that are deep enough to expose metal cannot be resolved through wet sanding alone.
•Wet sanding primarily repairs damage to the top layers of paint and clear coat.

2.Assess the type of sanding you need to do. The damage that you are trying to repair will dictate how much sanding will be required, and with what type of paper. Significant clear coat damage will require multiple steps, but light scuffing can be resolved in one stage.
•If the damage to the paint is light, skip the 1200 or 1500 grit sandpaper and begin with 2000 or 3000 grit paper instead.
•If you are wet sanding a newly painted surface, you can also jump directly to the 2000 or 3000 grit paper.
3.Purchase 1200 or 1500 grit sandpaper. When repairing worn, scuffed or scratched paint, begin with a 1200 or 1500 grit sandpaper. You can purchase sandpaper at your local hardware store, large retail store, or auto parts store.
•Any less than 1200 grit sandpaper may produce scratches that are difficult to buff out.
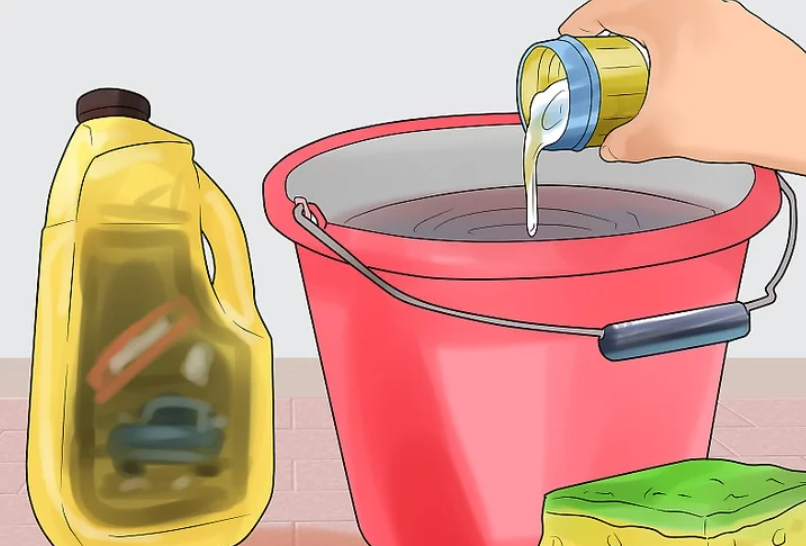
4.Fill a bucket with water and a small amount of automotive soap. Wet sanding requires a lubricant to prevent the sandpaper from burning the paint. Fill a regular bucket with water and a small amount of automotive soap. Do not use an automotive soap that also serves as a wax or a polish.
5.Cut the sheets of sandpaper into halves lengthwise. Remove the sandpaper from its package and hold it like a sheet of paper, so the longer edges are on the right and left. Use a pair of heavy duty scissors to cut the sandpaper sheets lengthwise to double the number of sheets you have.
•The width of the cut sheets will wrap around most sand paper squeegees and handles better.
•The strips need to be long rather than wide in order to dip half of them in water.
6.Soak half of each sheet of sandpaper for five minutes. Place the sandpaper sheets along the edge of the bucket so half of each sheet is soaking in the soapy water. Leave them to soak for five minutes or so.
•The halves that are soaking in the water should be completely saturated with soapy water before moving on.
•The dry portion will allow you to attach the sandpaper securely to your tool of choice.
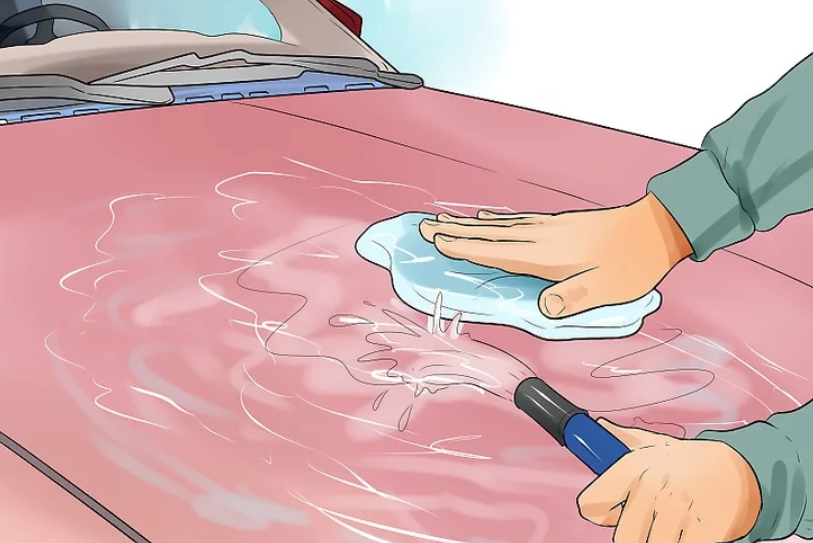
1.Wash and dry the area. Before you begin wet sanding, be sure you remove any debris or film from the area you will be working on. Use a regular automotive soap and a sponge to wash it, then rinse it thoroughly with a hose.
•Do not use an automotive soap that is also a polish or a wax.
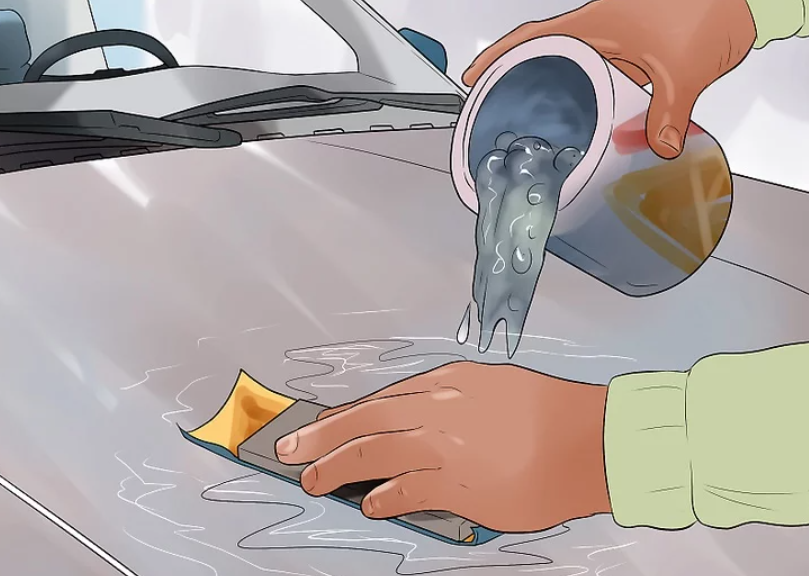
2.Wrap the sandpaper around a sanding squeegee or pad. Do not simply use your hands when wet sanding. The gaps between your fingers will create an uneven sanding surface, resulting in an inconsistent finish. Instead, wrap the sandpaper around a pad, handle or sandpaper squeegee based on your preference.
•Depending on the area you are wet sanding, there are flat, curved, and bendable handles you can choose from.
•Read the instructions on the tool you opt to purchase to see how to secure the paper to it.
•You can buy sanding tools at most hardware and auto parts stores.
3.Sand gently in circular motions. With the sandpaper thoroughly soaked, begin sanding the area with small circular motions and a light amount of pressure. If your sanding does not seem to be affecting the clear coat, apply a little more pressure so it will. Do not press hard enough to create scratches in the paint itself.
•It may take a little practice to determine just how much pressure you need to apply to the sandpaper.
4.Move the sandpaper in multiple directions to ensure an even sanding. Switch the direction of your circular motions from time to time or approach the area from a different angle. This will ensure you sand the entire surface evenly.
•Uneven sanding can be difficult to identify while you work, but may be apparent in the final product.
•Be careful not to increase pressure when changing angles or directions.
5.Add water as necessary. Do not allow the sandpaper to become dry while wet sanding. Keep the area heavily saturated with soapy water throughout the process by dipping the sandpaper in the bucket often and even pouring some of the soapy water on the vehicle.
•As the sandpaper gets dry, it will produce heat which can burn the paint.
•If you burn the paint, you may need to have that component of the body repainted.
1.Rinse the sanded area. Once you have completed the wet sanding, use a hose to rinse off any soap or debris left on the vehicle. Be sure you rinse it thoroughly because you will need to apply a glaze or wax to the area once it dries.
•Touch the area with your hand to ensure there is no soapy residue left behind.
2.Allow the area to dry completely. The wet sanded area will need to be completely dry in order to buff properly. Do not allow the area to sit in direct sunlight, as it may damage or fade the paint. Instead, leave it to dry for a few hours in a shady area.
•You can use a towel to dry the area, but allow any remaining moisture to air dry completely before moving forward.
•You may use a hair dryer or other heat source to expedite the drying.
3.Apply a wax to the finished area. Once the area has been buffed, it should look like the finished product. Use a high quality automotive wax on the area to provide an additional layer or protection. Wet sanding can make that area of the paint slightly more shallow than the rest of the vehicle, so a layer of wax can help prevent it from fading at a different rate than the rest of the paint.
•You may want to wash and wax the entire vehicle to ensure no dust or debris from the wet sanding remains on the vehicle when you’re done.Waxing the car will protect the paint and create a more brilliant shine.
Aussie Auto-glass, With our highly trained team, we are able to provide you with professional windscreen replacement service and satisfied customer service.
Book your appointment now and get 10% discount.
And give us google 5 Stars feedback and get a free drink on us.
MAKE APPOINTMENT


